April 20, 2012

Dotty For You!


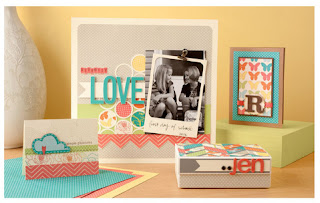
LOVE this year's National Scrapbooking Month promotion! It features this beautiful paper packet with fun prints on one side and adorable polka dots on the other side! I LOVE polka dots! When you place an order of $35 or more in products from the Spring/Summer 2012 Idea Book between April 17 and May 31, you may add the Dotty for You paper packet, valued at $19.95, for just $5. That's right! Just $5! Dotty for You includes 24 specially designed, coordinating B&T Duos®sheets (2 each of 12 patterns) and an artwork idea insert to get your creative juices flowing. But that’s not all! There are two ways you can get this darling paper packet FREE! Hostesses will receive a free Dotty for You paper packet when their Gathering sales total $400 or more (excluding tax, shipping/handling, and Operation Smile donations). Or new Consultants who sign up between April 1 and May 31 (two full months!) will receive a free Dotty for You paper packet with their kit.  

No matter what projects you have in mind, you will love these dotty papers! Enjoy!

March 19, 2012

Create Your Own Patterned Paper

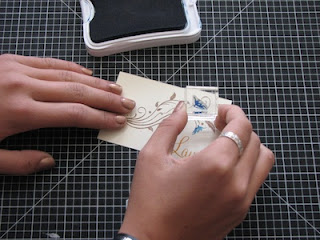
Create your own patterned paper? Yes you can....in Studio J! I love it! Check out this great video with tips on how to create your own patterned paper and more!


March 16, 2012

Virtual Garage Sale!

It's spring cleaning time and I'm making room for new stamping and scrapbooking goodies by having a virtual garage sale! I literally have over 100 stamp sets (many of them never used) that have been retired and need a good home. :) Stamp sets range in price from only $3 to $9 so there are killer deals for you!! All of the stamps are listed on this site: www.stampnscrapads.com and just click on acrylic stamps. Happy saving!

March 3, 2012

Double the Scrapbook Night Fun!

Check out what we made at Scrapbook Night last night! We love the new papers in this new idea book that we couldn't make just one kit...we had to do two! So we made these beautiful Lucy layouts AND the masculine Victory layouts. Love them both! We play and scrapbook together the first Friday night of every month so if you want to come join in the fun, let me know and you can come play with us!


Lucy Layout 1


Lucy Layout 2


Victory Layout 1


Victory Layout 2


February 9, 2012

Faux Stitching


I love this new flower stamp! It has an adorable stitched border and you just fill in the petals with different patterns or inks. So fun. I wanted to carry the stitching look from the flower over into the rest of the card but I honestly was feeling a little lazy about pulling out my threads to stitch it! ha! ha! So instead I created "faux" stitching around the edge of the card. It's so simple. Here's how:

1. With the bone folder or other scoring tool, score dash lines. I just free handed mine, but you can measure it if you like to be more precise.
2. Now lightly sand the scored marks and they will pop right off the page! It looks like you have stitched around the card with white thread. It's that easy!

Hmmm...now what else can I stitch? :) Enjoy!

February 7, 2012

Consider Yourself Hugged!


I found these little tins tucked away in a box of craft supplies I haven't looked at for awhile and was so excited! So many fun things that you can do with them! And with Valentine's Day next week, I thought I would make a treat for my three darling children. So I grabbed my February Stamp of the Month (told you I LOVE that set! Ha! Ha!) and the beautiful new Stella paper and this is what I came up. Guess what is in inside each box? Hershey's "Hugs" of course! :)

What are you whipping up for your valentine?

February 6, 2012

Thoughtful Tidings


Thoughtful Tidings (Set of 11) 


I LOVE the sentiments and sayings in this fabulous stamp of the month! Creative, unique and so useful…you will just love the fun things you can make with this must-have stamp set! Oh, and it gets even better...most of the images shapes can be cut out with the Art Philosophy Cricut cartridge! Love it even more! February will be a very good stamping month. :)

January 25, 2012

Heart Warming Winter Cards

It's January and a dear friend is having a birthday. Or a neighbor brought you over some homemade cookies and you want to give them a thank you card. Do you reach for your flower or summery stamps? No way! Use a winter theme for your cards since it's winter! Or fall themes if the occasion is in the fall...you get the idea. Not all birthday cards have to have balloons! Ha! Ha! I love to make "seasonal" cards for your every day thank yous, get wells, and birthdays. That's why I reached for my "winter" stamps and the beautiful Wonderland paper to create these special cards. Check out how the pin clips are used to create "steam" rising from the hot chocolate mug. So fun! So use the seasons the next time you are creating and break away from the standard "balloons are for birthdays" mold!

Happy creating!

January 19, 2012

Love Your Layout!

Dreaming of snow? We have some friends whose children are seeing snow for the first time this year. It's so exciting! And it reminded me of the beautiful Wonderland papers. Check out this Love Your Layout video that shows you how to create a darling snow themed layout...along with a great tip on how to create borders with stickease! You'll love it!


January 12, 2012

All Stitched Up!

I LOVE stitching on layouts, cards and other craft projects. I just think it is so cute and adds a great touch! I have always been a little sad that I couldn't stitch on my Studio J layouts...until now!! They have added some fabulous stitching options to your embellishing options in Studio J. I'm in heaven!


Check out the cute stitched ribbon in the layout above. I created that stitched looking ribbon simply by dragging the running stitch pattern on top of the ribbon and then choosing a color. That's it! So easy!

There are tons of stitching options in Studio J...a variety of stitches, cross-stitches, stitched shapes like circles, hearts and flowers, and there are even stitched pennants and banners. All you do is click and drag them on...fast and easy just like all of our other embellishments. So swing on over to studioj.com and play....you'll love it!

January 9, 2012

A Perfect 10!


January is free layout month for Studio J® members! For every 9 custom-printed Studio J layouts you buy, you’ll receive the 10th layout free. To receive the discount, just add 10 or more layouts to your cart. You’ll see a discount reflected in your order total. And you can totally take advantage of this promotion by ordering in multiples of 10. Buy 9, get 1 free. Buy 18, get 2 free. Buy 27, get 3 free. And so on! If you’re not a member yet, now’s a great time to join!

Dates: Offer valid January 1, 2012–January 31, 2012.

December 5, 2011

Holiday Gift Tags? Check!

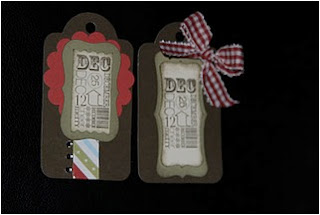
Holiday gift tags? Check! I love making holiday gift tags to dress up my presents and packages. And they are so easy to do. Watch this little video and you'll see just how easy they are!

November 14, 2011

Cut Your Stamps? Are you Crazy?


One question I get from my customers is, “I’ve heard you can cut acrylic stamps. Is it really okay to cut my stamps?”  The answer is YES!! I know it’s scary to do but it opens up a world of possibilities with your stamps!

First of all, why would you want to cut your stamps? Well perhaps you have a saying that is long and narrow but you want the words to be stacked on top of each other to fit a square space. Or perhaps you only want to use part of a stamp.


When I created this card the other day, I had a vine stamp and I wanted to stamp this cute flower onto the vine without the stem and leaves. Yet, the way the stamp was designed it was difficult to ink up just part of the stamp. The answer? Cut the bloom!


I just took the stamp off the carrier sheet and decided where to cut. When cutting a stamp, I like to make sure that there is enough blank space around the image to make it easy to cut the image without cutting any other parts of the design. As you get more confidence in cutting stamps you can get more daring. J When you have planned your cut, simply use your microtip scissors and cut your stamp.


Now you have your stamp in two pieces. It’s easy to put both pieces together on a block to stamp the whole thing as one image in the future. So you don’t have to worry about not being able to use the whole stamp together as one piece another time. You have the best of both worlds!


Now just stamp your image.


And voila! Your final card! See the cute blue blooms on the vine. I couldn’t have done it easily without cutting that stamp. 


See! It’s super easy to cut your stamps and have flexibility with your images. Enjoy!

Supplies:
·      Dreamin’ paper packet
·      D1482 Love Life stamp set
·      D1436 The Present stamp set
·      Art Philosophy Seasons stamp set
·      Chocolate, Goldrush and Pacifica ink pads
·      Bronze Glitz Gel
·      Basic button collection

November 9, 2011

Studio J....Not Just for Scrapbooking!

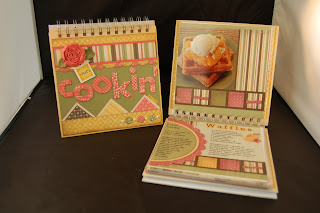
Do you think that Studio J is only for scrapbooking?  Think again!  Here is an example of a recipe book that was made using Studio J.  You can take your JPG’s and have them printed any size that you want.  In this example, they were printed in 6” X 6” size so that they would fit into a My Creations Display Album.  You could make a book with a collection of favorite Christmas recipes, family favorites, soups, etc.  Make each recipe and take a photo of the finished product and include it with the recipe for a gift that is sure to be cherished. 


November 3, 2011

Cherish the Day!


So I have a secret to tell you!  I LOVE the November Stamp of the Month! :) It is a delightful set filled with images for each month of the year. Check out some great artwork ideas, created by my friend Sandy.


And she made it all without using a single pair of scissors! She used the Cricuit Art Philosophy Cartridge to cut out all of the tags, pop up boxes, tickets and even the cute fry box!   She said it was so fast and easy it left her more time to stamp and create beautiful works of art.


 The Fry Box makes the perfect Studio J gift card holder, or any other gift card (Don't have a Studio J gift card? Give me a call and we can take care of that). It is the perfect gift for everyone on your Christmas List!


The best part of the Stamp Of The Month set is you can get it for as little as $5.00.  Get ready to create all of your holiday gifts Faster, Simpler and Easier!


October 21, 2011

Name that Paper!!


Can you name the paper packet used in this Studio J layout?  


Stumped? It’s Michief! That’s right…a Halloween themed paper! Would you have ever dreamed of using Halloween paper on a Homecoming layout? That’s one of the benefits of Studio J.  You can play with paper combinations that you wouldn’t normally try! On this Homecoming layout, I simply chose any paper kit mix I wanted. Then I swapped the papers for two of the more traditional papers in the kit. Added some accents that matched the colors in the picture and voila! A surprise layout that does not look “Halloween” at all. So the next time you hop on Studio J, play around with swapping papers and the different looks and combinations that you can get!

October 19, 2011

Making Great Black and White Photos


Halloween is almost here and you’ll be taking those traditional photos of your ghosts, goblins and fairy princesses. A fun way to capture some Halloween spirit is to turn some of your color pictures into black and white.  It is very easy to do using Studio J, just drag and drop your photo into a layout, click on the Filter drop down and you can change it to Black and White or Sepia. Using these filters is a perfect match with the new Mischief paper. Don’t be scared – give it a try!

Here are 5 Tips for your Black and White Photos to come out looking sharp.
Shape and Form - When looking for a good shot, look beyond the colors in a scene and instead focus you attention on the shapes. Try to create an interesting composition.
Contrast - Without differences in color to separate elements in your shot, you must instead introduce contrasting shades. Use contrast to help your main subject stand out – such as a light subject against a dark background.
Pattern - Black and white photography gives you a much better chance of capturing interesting patterns because it focuses the viewer's attention on the shapes formed by the elements in a scene.
Texture - In the same way that patterns can be lost in color photography, textures can be too. With black and white photos, the mind no longer has that color information to work with, so it pays more attention and focuses on the elements such as texture and pattern.
Lighting - Lighting is absolutely key to a good black and white photograph because it affects all of the above elements - shape, contrast, pattern and texture.
Side lighting often produces the most dramatic black and white photos. It picks out the edges of shapes and increases contrast by adding highlights, and the shadows it creates add interest to the scene as well as enhancing textures and patterns.


October 5, 2011

Sleigh Card

Check out this adorable Sleigh Card made by my friend Allison. So simple to make and fun to give! And of course...it uses the October stamp of the month!  Love it!

October 3, 2011

Simple and Sweet


It's that time! Christmas will be upon us before we know it. Wouldn't it be nice to have all our Christmas cards ready before December? This months SOTM is a step in the right direction. When you purchase $50 in product, you can also purchase this cute set for just $5! Then you can enjoy creating sweet and simple projects to make your holiday season festive! Watch for more cute and easy projects using this adorable stamp set each day this week! You will be inspired by simple and sweet holiday creations that you can create in a snap!

By the way, aren't these children in this above layout adorable? They are my nieces and nephew! So stinkin' cute! They were thrilled to be featured in the Close to My Heart Idea book! My nephew even said, "I'm famous now!" I love it. What a cutie. 


September 28, 2011

Raid Your Stash for a Little Extra Bling!

I had so much fun creating some new Studio J layouts the other day. Yesterday they arrived in the mail and I eagerly ripped open the box! :) As I looked at them I noticed on my table was sitting some left over bling from another project I had just finished (imagine that! I'm actually finishing projects! ha! ha!). So I decided to add some of that extra bling to my layouts. Sooooo awesome! I love the look! I had so much fun in fact that I did another one! The pictures really don't do it justice, but here are some picts anyway:

Before


After with a  little extra bling


Before


After with a little extra bling

All I did was raid my stash for a little extra bling and voila! So much fun!